Straw bale gardening is simple and effective. Setting them up is the hardest part but there are many benefits to this type of garden. Let’s take a look.
Last year I tried a few off-the-wall types of gardens, including a straw bale garden.
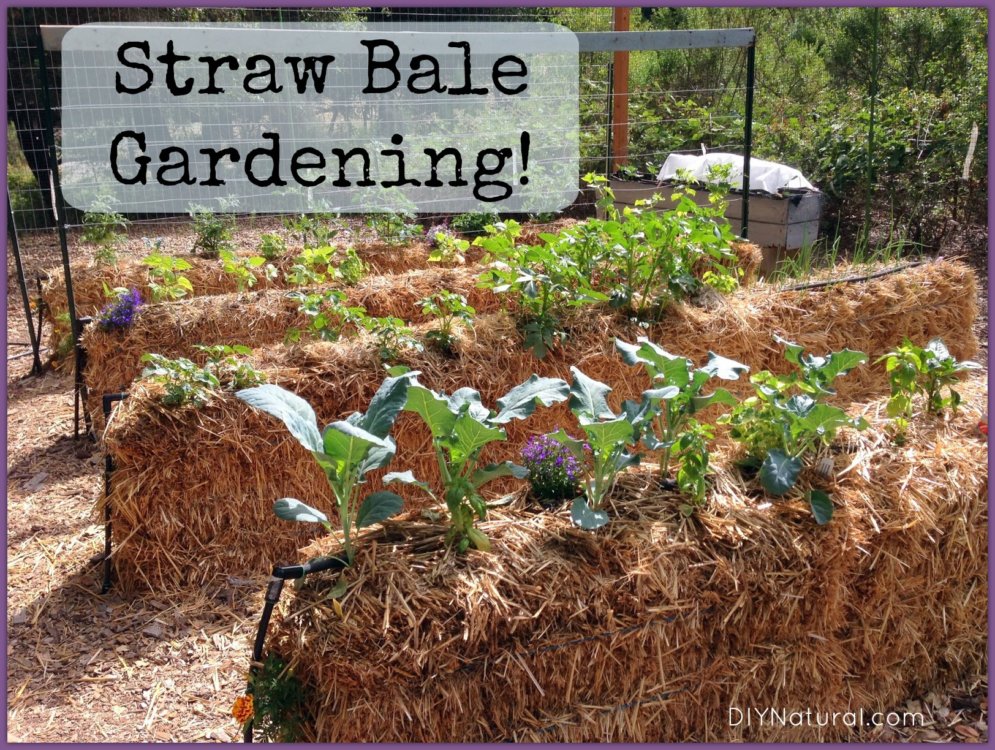
Plants growing out of straw bales – I had seen them being done, but I was skeptical of the results it could yield. I decided to try it with one bale. Big mistake! I should have done a bunch of them!
Why Straw Bale Gardening?
A straw bale garden is a very simple system to set up, and there are many benefits to growing this type of garden:
- Very few weeds grow in straw bale gardens, and because they are elevated, weeding is easier than in a conventional garden.
- They are also great for seniors who still want to garden but have a hard time getting up and down. The elevated design makes it very easy for them to maintain.
- Being off the ground seems to deter a lot of pests.
- Straw bales tend to stay damp longer, so they don’t need to be watered as often.
- Straw bales aren’t a permanent structure if you decide you don’t like the positioning of your garden.
- When you’re done for the year the leftover straw can go into the compost.
Starting Your Straw Bale Garden
Choosing a Location and Setting Up
First, you need to find a sunny spot in your yard that won’t be in the way. Last year I only had one bale, but this year I will have at least 10 of them, so I needed to find a large enough space. I put mine along a fence line in the back yard. They will get east and west sun most of the day, at least 6 hours. This is important for most vegetable crops.
READ RELATED: The Worst Restaurant Breakfasts in America in 2022
Place your straw bales in a row or group them together. Do whatever is easiest for you to maintain. Then, it’s time to get started. The conditioning steps will take about two weeks.
Conditioning the Bales
- Place your straw bales cut side up in your garden area. The “straws” will act as tubes, holding water and nutrients for the plants. The twine holding it together should run around the sides of the bale, not over the top and bottom. Don’t cut the twine, you’ll need it to hold the bales together.
- On days one through 3 or 4, water the bales well. It’s important for them to remain damp during the conditioning process.
- For the next 6-7 days fertilize the bales. You can use a commercial organic water-in fertilizer, but I used compost tea. (Learn secrets to making great compost tea.) Make enough tea so that you have 2 gallons or so for each bale and water in thoroughly.
- For the next few days, use only water to moisten bales.
If you check the temperature, you’ll see that bales in your straw bale garden will heat up quite a bit and then cool down again. Don’t start planting until the temperature comes down to around 80°F. Any warmer and it could kill the roots of new plants.
During the conditioning process, you may notice steam coming from the bales – this is normal as the temperature rises. The straw on the inside of the bale is actually beginning to decompose, much like it would in a compost bin. It is normal to see black gunk making its way to the top of the bales or mushrooms forming. Don’t worry, neither is harmful, and the mushrooms can be pulled out if you wish.
Planting in the Bales
- After the temperature comes down, you’re ready to plant your straw bale garden. An average straw bale can handle 2-3 tomato plants or 2-3 pepper plants. Place them in a line on the top, digging into the bale a bit to set the roots.
- You can also plant seeds – just dig a small trench, fill it in with some soil, add your seeds, and cover lightly with soil. I’m going to try an herb bed this year using this method. The seeds require a small amount of soil to help get the roots started.
- If your plants need support, you can use tomato cages or poles.
- The poles or cages can also serve as support if you need to cover for frost.
- I supported my pepper plant last year and let my tomatoes run over the sides. They were very easy to harvest and pinch off when it was time to do so.
- Try sweet potatoes or squash on the sides. Let them run and they’ll do really well.
- Flowers? Sure! Why not? I planted a few marigolds and nasturtiums for color and to detract bugs.
- Really, the planting possibilities are endless.
Caring for your straw bale garden
- Water plants as needed. Straw bales stay damp longer, so watering won’t need to occur as often as in a regular garden.
- You may also need less fertilizer. Decomposing straw creates compost which is usable by plants. This is mostly nitrogen, so you may need a little extra phosphorus for root growth.
- At the end of the season, you can put the straw in the compost to decompose the rest of the way or pile up in a corner of the yard. You can use most of it in the spring.
- Then, why not get a few more bales in the fall? You could plant lettuce and kale, maybe even broccoli and spinach! Any cool-season crop should do well and you can cover it to extend the season.
Have you ever planted a straw bale garden? Share your experience in the comments below!
*******
photo credit to Patty Lakinsmith
Source: DIY Natural – Food