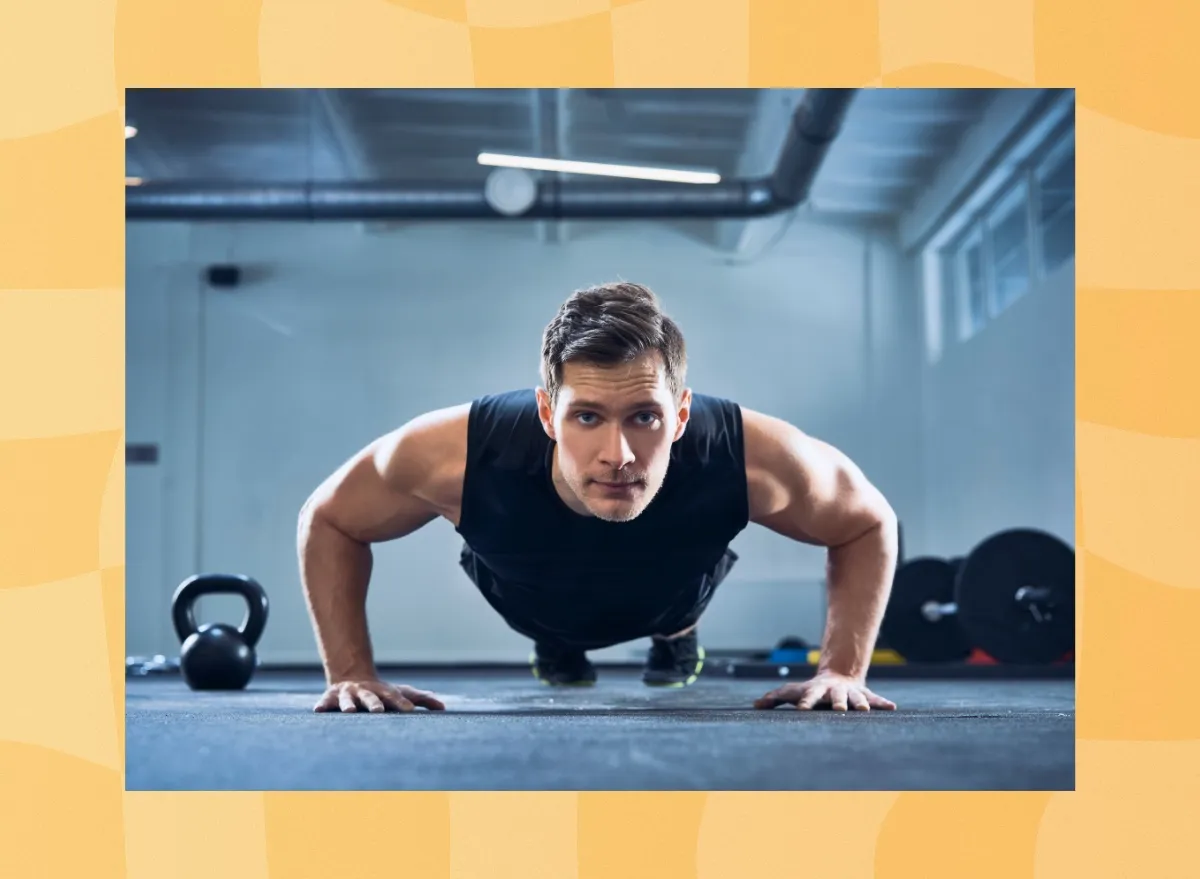
Could the secret to lifelong health be … staying still? It sounds counterintuitive, but in a recent study, researchers assessing 270 randomised controlled clinical trials (involving more than 15,000 participants) found that isometric exercises, in which muscles are working but remain motionless, were more effective than a range of other options for reducing blood pressure.
To be clear, aerobic exercise training, dynamic resistance training, combined training and high-intensity interval training all helped, compared with non-exercise control interventions. But isometrics were most likely to reduce blood pressure, with full-body movements such as the wall squat showing bigger benefits than moves such as hand-gripping or leg extensions.
The first obvious question is: why? Followed by: how do I use this information?
To answer the first bit: isometric exercises are likely to cause the greatest increase in blood pressure during the exercise, when muscles are contracted and blood vessels narrow. When you stop doing them, of course, those same blood vessels relax – something researchers theorise might lead to improved blood flow regulation in the long run.
As for the second question, here’s how to incorporate isometric training into your week – whatever your fitness level.
How to use these workouts
Each set of moves below – beginner, intermediate and advanced – contains exercises designed to work the most important muscle groups of the body. The study authors suggest doing isometric movements alongside other modes of exercise to see the biggest benefit. To fit it all in, either do all five movements in a circuit, or add two to three moves at a time to your other weekly workouts, aiming between two and four sets of each.
You can hold each movement anywhere from 30 seconds to two minutes at a time, depending on your fitness level: the most important thing is not to let your form collapse. Oh, and remember to breathe: “We can often be tempted to hold our breath during isometrics, but that can be counterproductive,” says the personal trainer Tim Low. “Slow nasal breaths are the way to go when attempting all of the following.”
Beginner moves
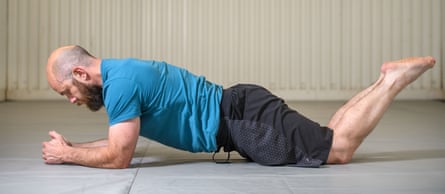
Knee plank
This is a simplified version of the classic plank; it’s very effective if you pay attention to your form. Start on your knees and forearms, keeping your elbows aligned under your shoulders. “Engage your core muscles by drawing your belly button upwards towards your spine and squeezing your glutes,” says the fitness and wellness coach Lorena Savvidou. “Make sure to keep your body in a straight line from your head to your knees, and avoid dropping your hips or arching your back.”
Shoulder bridge
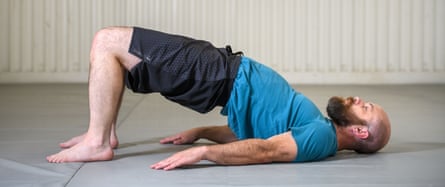
“We’ve all seen kids do a handstand into a back bridge, but as we get older and stiffen up, it seems like an unrealistic option,” says Low. The good news is that there are several regressions we can use. Start with a basic shoulder bridge: lie on your back with your feet shoulder-width apart and close to your buttocks, then press through your heels to bring your hips up in the air, and hold. “You’ll strengthen your spinal muscles, but also combat excessive sitting or forward-leaning posture by opening up the hip flexors,” says Low.
Fire hydrant
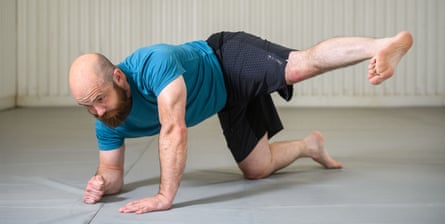
This move targets and activates the gluteus medius, making it a good warm-up for squatting or running, as well as an excellent standalone movement. Start on all fours with your wrists under your shoulders, your knees under your hips and your toes pointing down into the ground. Now, put one forearm on the floor and allow your body to rotate slightly to lift your opposite leg out, like a dog watering a fire hydrant. Aim to keep your knee in line with your hips both vertically and horizontally. If you’re doing it properly, you’ll probably feel your glutes “switch on”.
Tabletop crunch hold
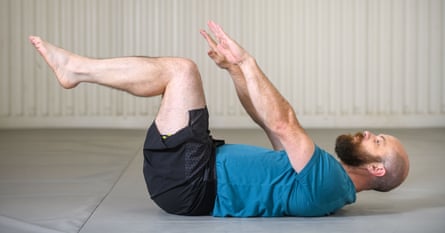
This one strengthens your core muscles, particularly your abs and lower back. Start by lying on your back, engaging your core by drawing your belly button down towards the spine. Bring your legs off the floor and into a 90-degree “tabletop position”. Bring your shoulders off the floor, and reach forward with your arms, palms facing downwards and chin tucked in. “This can reduce the risk of back pain,” says Savvidou. “But it’s important to keep your back in contact with the floor and not allow it to arch, putting pressure on it.”
Squat hold
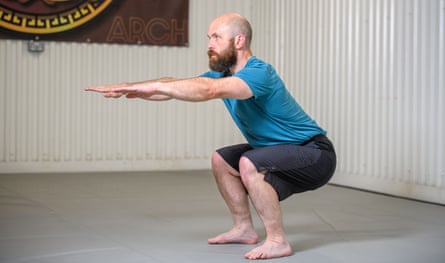
This static version of the squat will strengthen your leg muscles, especially the quadriceps, hamstrings and glutes. Stand with your feet shoulder-width apart and your toes pointing slightly outward. Keep your back straight. As you start bending your knees, push your hips backwards and downwards. Go as low as you can without lifting your heels off the floor – if you’ve got any small weight plates handy, putting your heels on them will help with the depth. Avoid arching your back or letting your knees move inwards.
Plank
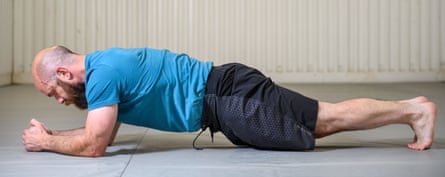
For the classic version of the plank, start with your forearms and toes on the floor and your body in a straight line from head to heels. Engage your core and gluteus muscles, and aim to keep your legs as rigid as … well, the clue is in the name. Make the exercise tougher by keeping your heels together and elbows narrowly spaced, so that you’re working harder on balance. The world record for holding a plank is more than nine hours, but you can benefit from the position in minutes if you avoid sagging and stay straight.
READ RELATED: 28 Best Target Labor Day Sales to Shop in 2023
Crab hold
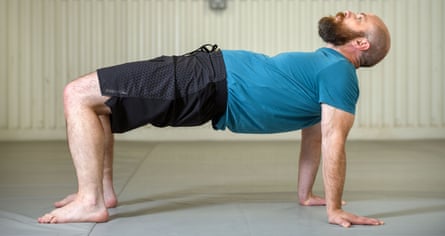
The posterior chain, made up of the muscles on the backside of the body – including the back muscles, glutes, hamstrings and calves – is hugely important for most people, but easily neglected in traditional workouts. Fix it with this move, which engages most of those muscles together. Sit on the floor with your feet close to your bottom and hands under your shoulders, then drive your hips upwards until you’re in a sort of tabletop position. “Pointing your toes out slightly will help target the glutes effectively,” says Low. “But don’t hyperextend your hips.”
Bird dog
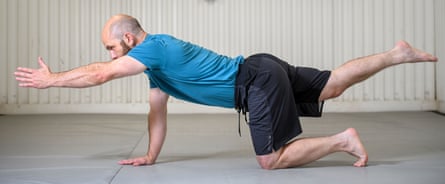
Technically, this one is a “contralateral quadruped hold”, but the more memorable name comes from the way it mimics a pointer suddenly sniffing a pheasant. Start on all fours with your wrists under your shoulders, your knees under your hips and your toes pointing down into the ground. Lift one hand and the opposite foot off the ground. “You may be tempted to shift at the hips,” says Low. “But imagine you have a tennis ball or a glass of water balancing on your lower back and you need to keep your spine as neutral as possible.” Pause, then repeat on the other side.
Side plank
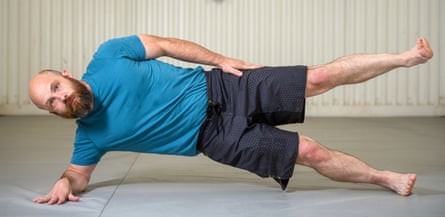
This variation on the traditional plank hits your oblique muscles – part of your core – harder, while also engaging your shoulders and hips. Start by lying on your side with your feet either stacked on top of one another or one foot in front of the other. “You can rest on your forearm or hand,” says Low. “But if you have wrist issues I’d suggest the former.” Now lift your hips off the ground until your body is in a straight line, and then hold. If it’s too easy, lift the top leg so that you look like a sideways star: for a simpler version, keep your knees bent or use your top arm for extra support.
Hollow hold
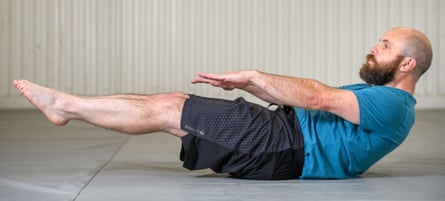
This is a favourite of gymnasts. It can help out with other body-bracing exercises (think pull-ups and press-ups) – and is fairly easy to do while you’re watching TV. Lie flat on your back with your arms by your sides and legs fully extended. Lift your straight legs, shoulders and upper back off the ground, stopping the exercise if you can’t keep good posture. “A common mistake is keeping your back straight instead of letting it naturally curve up,” says Savvidou. “As with most of these movements, thinking about drawing your navel to your spine will help.”
Advanced moves
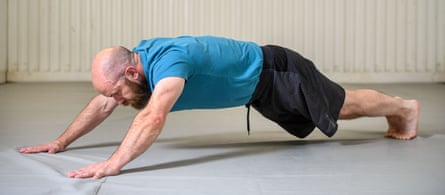
Extended plank
This is the toughest version of the plank, and not for the faint of heart or weak of shoulder. Start in a press-up position, then bring your hands slightly ahead of your shoulders – you can extend further if you’re feeling stronger. As with the other plank variations, brace your core and don’t let your hips sag.
Copenhagen plank
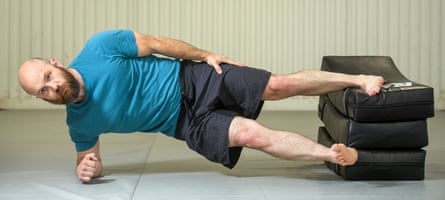
“I suffered from chronic groin injuries for many years as a young footballer and this is one of those exercises I wish I’d known about,” says Low of this little-used but effective side-plank variation, supposedly popularised by Danish athletes. Set yourself up on your side as you would for a side plank, keeping your top leg on a bench or (preferably padded) chair. From here, lift your hips up off the ground. “It’s important to keep your foot flexed and toe pointed to brace and secure your knee,” says Low. “We don’t want shear force going through the knee joint.” Too tough? Keep your lower foot on the ground to take some of the weight.
Aeroplane pose
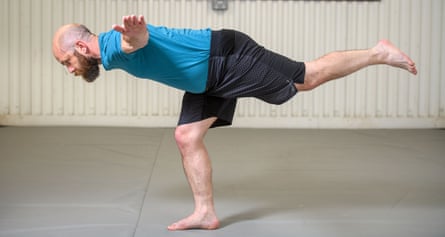
This advanced movement from yoga (where it’s known as “dekasana”) targets all the areas we need to work on as we get older: stretching hamstrings and strengthening shoulders to encourage upright posture, while also building balance. Start from standing, facing forward, then simultaneously bend forward and lift one leg off the ground behind you, aiming to make a T shape with your body. With straight arms to the side, squeeze your shoulder blades back. “Imagine your head is the tip of an arrow as it stays in line with the standing foot and your back leg counterbalances,” says Low. “To make this much more difficult, try it with your eyes closed.”
Wall sit

The PE classic isn’t exactly pleasant, but it’s an excellent way to build up your leg muscles without the balance challenges of the squat. By slightly shifting your weight, you can shift the exercise’s emphasis to the muscle group you most want to work. Find a clear wall and stand with your back against it with your feet shoulder-width apart, lowering your body until your thighs are parallel to the ground – you should be able to put a broom handle on them without it rolling off. Hold until it’s mildly unpleasant, remembering to breathe.
Extended hollow hold

For this progression of the normal hollow hold, lie on your back and then lift your straight legs off the ground, extending your arms backwards behind your head. As with the hollow hold, keep your body in a shallow “dish” shape, stopping the movement before your form starts to fall apart.


