If you’ve lost significant weight or are experiencing the natural effects of aging, you might have noticed saggy skin in various parts of your body. Loose skin can be frustrating—especially after putting in all the hard work to get fit and healthy. However, before you consider surgical options or expensive treatments, there’s one natural solution that could help: strength training exercises. We chatted with an expert who walks us through seven strength training exercises for saggy skin all over your body.
By building and toning muscle through strength and weight training, you can tighten and firm up loose skin. While it may not completely eliminate all instances of saggy skin, it can help reduce its appearance—especially if the sagginess is due to weight loss. Additionally, these exercises can improve your overall strength, balance, and mobility, allowing you to enjoy a higher quality of life and reduce the risk of injury.
Fortunately, we chatted with Rose McNulty, CPT, NASM-certified personal trainer and nutrition coach with Garage Gym Reviews, who delivers seven effective strength training exercises that can help tighten saggy skin all over your body. “The only way to truly remove sagging skin, including extra skin resulting from weight loss, is to remove it surgically. However, strength training builds muscle, which can help lessen the appearance of sagging skin by taking up more space beneath it. In addition, muscle mass can replace the lost fat to an extent, leading to less saggy skin,” explains McNulty.
These exercises require little to no equipment and can be done at home or the gym. Incorporating these moves into your regular workout routine and a healthy diet and lifestyle can help you achieve a leaner and more toned physique. So, let’s get started and say goodbye to saggy skin for good. After, check out 7 Simple Daily Exercises To Shrink Hanging Belly Fat.
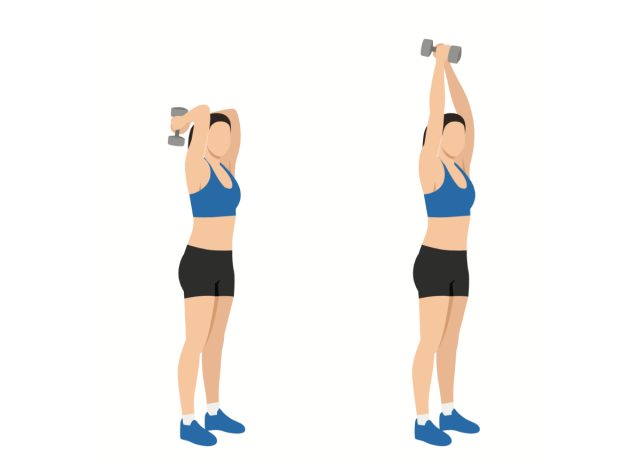
“While biceps are often the focus of arms training, the triceps comprise about 70% of your upper arms,” states McNulty. “Building up your triceps will help fill the sagging skin around your upper arms.”
To set up for this first exercise, hold one end of a dumbbell with both hands, letting the opposite side hang down. Next, press the dumbbell overhead with your arms extended straight up. Bend your elbows to slowly lower the weight behind your head as far as your range of motion allows. Then, straighten your arms to bring the weight back overhead, and repeat. Aim for three to four sets of 10 to 12 reps.
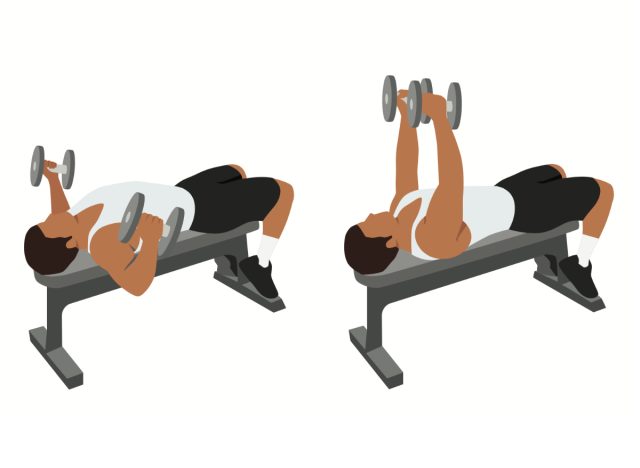
“Building chest muscle can help lessen the appearance of sagging skin across your chest. A great way to work on this is through chest isolation exercises like the flye,” recommends McNulty.
Lie on a flat bench with a dumbbell in each hand, resting the weights close to your chest. Push the dumbbells straight up toward the ceiling with your palms facing inward. Slowly lower the dumbbells out and then down, keeping your arms mostly straight with a slight bend in the elbows. Once the dumbbells are out at your sides at about chest height, reverse the motion to raise them back up to the starting position, and repeat. Aim for three to four sets of 10 to 12 reps.
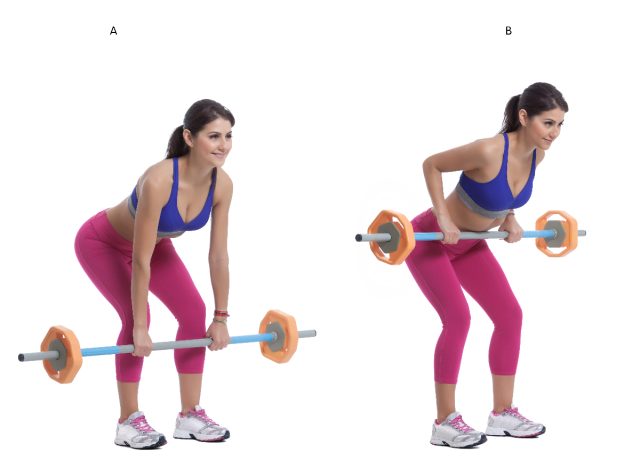
“The barbell row is an excellent exercise for building up your mid- and upper-back muscles, which can help fill out skin that may remain from excess back fat,” explains McNulty.
Load a barbell with plates or use a fixed barbell. Stand with the barbell in front of your legs, your feet about hip-width distance apart, and your knees slightly bent. Hinge at the hips, and reach down to grab the barbell with an overhand or underhand grip, with your hands about shoulder-width apart. Keep your spine neutral as you stand up to lift the barbell off the floor. Hinge at the hips again to lower your torso until the bar is about knee height. Pull the bar straight up to your lower chest, then lower it slowly once you tap the bar to your chest. Aim for four sets of 10 to 12 reps if you use light to moderate weight or six to eight reps with heavy weight.
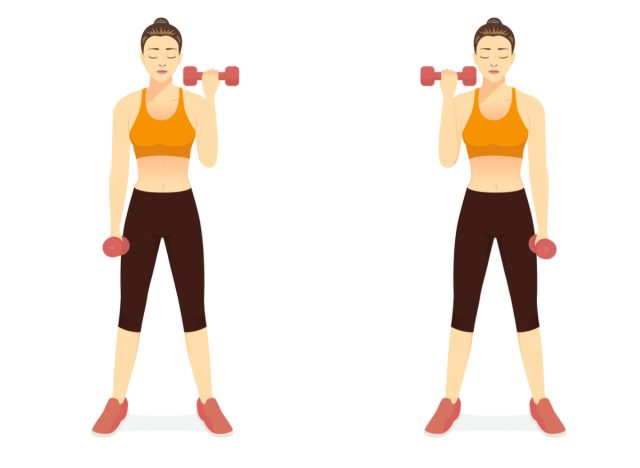
McNulty tells us, “Biceps are one of the first muscle groups most people think of when it comes to a muscular physique, and sculpting the biceps can help lessen the appearance of sagging skin on the upper arms—a place that tends to hold fat for many people regardless of prior weight loss.”
READ RELATED: Rising Early-Onset Colorectal Cancer Cases a Concern for People Under 40
Start standing in an athletic stance with your knees slightly bent, holding a dumbbell in each hand. Keep one dumbbell down at your side while you flex the biceps of your opposite arm to bend your elbow and lift the weight up and toward your chest. Slowly lower the dumbbell back to the starting position, then switch arms. Keep your upper arms at your sides throughout the movement, and avoid swinging the weights. Aim for four sets of 10 reps per arm.
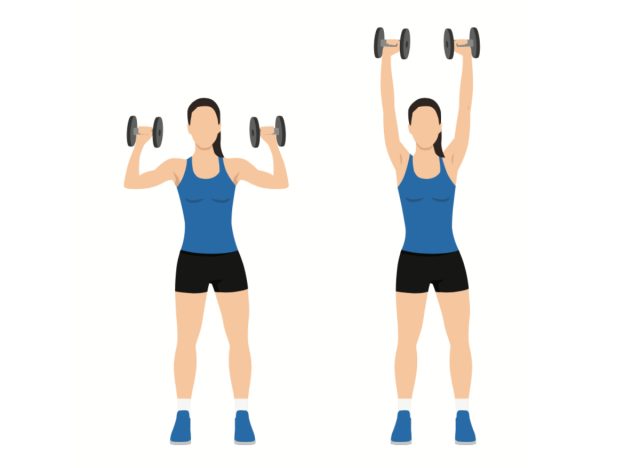
“A set of toned shoulders caps off your upper body and can give a sculpted look even when there’s some extra skin on the upper body,” states McNulty.
For the dumbbell shoulder press, grab a set of dumbbells and stand with your feet shoulder-width distance apart with good posture. Rest the dumbbells at about shoulder height and just wider than shoulder-width apart. Take a deep breath and tighten your core, then press the weights straight toward the ceiling as you exhale. Once your arms are almost straight, lower the dumbbells back to the starting position. Repeat the movement, aiming for three to four sets of eight to 12 reps, depending on whether the weight is heavy or moderate.
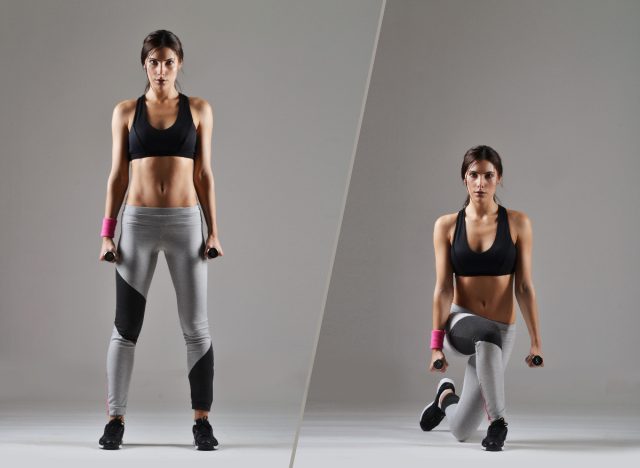
“This lunge variation is excellent for working multiple angles to build up your legs and glutes and improving coordination and balance,” says McNulty.
Start in an athletic stance with your feet shoulder-width distance apart or slightly wider, depending on your preference. Next, step your right leg behind and across your body, planting your right foot back and to the outside of your left leg. Next, bend your left knee to lower into a lunge until your right knee hovers just above the floor and your left thigh is parallel to the floor. Stand back up to the starting position, then switch legs. Aim for four sets of 10 reps per leg. Hold weights in each hand for an additional challenge once you’ve mastered the form for this effective lower-body movement.
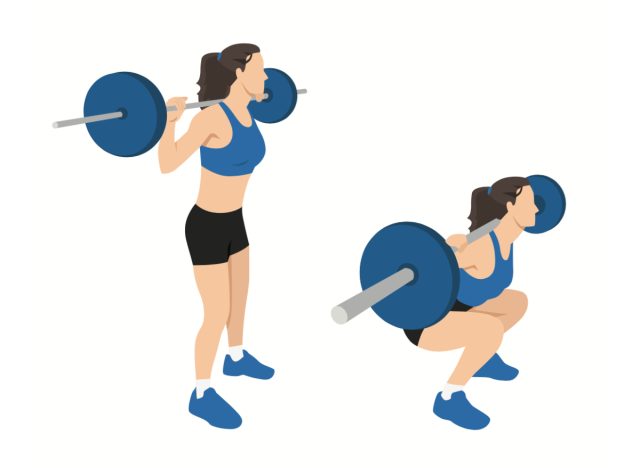
“Adding a tempo element to your squats simply means performing each part of the movement for a set amount of time, but it makes a difference,” says McNulty. “Typically, you’ll perform the lowering (eccentric) portion of the exercise for a longer period, keeping your muscles engaged for longer.”
To begin, stand in a squat rack in front of a loaded barbell racked at about collarbone height, then grip the barbell and situate yourself so the weight rests on top of your upper back. Lift the barbell off the rack and take a few steps forward, then stand with your feet hip-width apart or slightly wider and your toes pointed slightly outward. Bend your knees, and shift your hips back to lower down into the squat. Once your thighs are parallel to the floor, stand back up to the starting position and repeat.
For a typical tempo squat, McNulty suggests trying a 4-0-1 format—four seconds on the way down, no pause at the bottom, then one second on the way up. Maintain good form and posture just as you would with a regular squat. Aim for four sets of eight to 12 reps, depending on how heavy you go with the weight.
Source:


